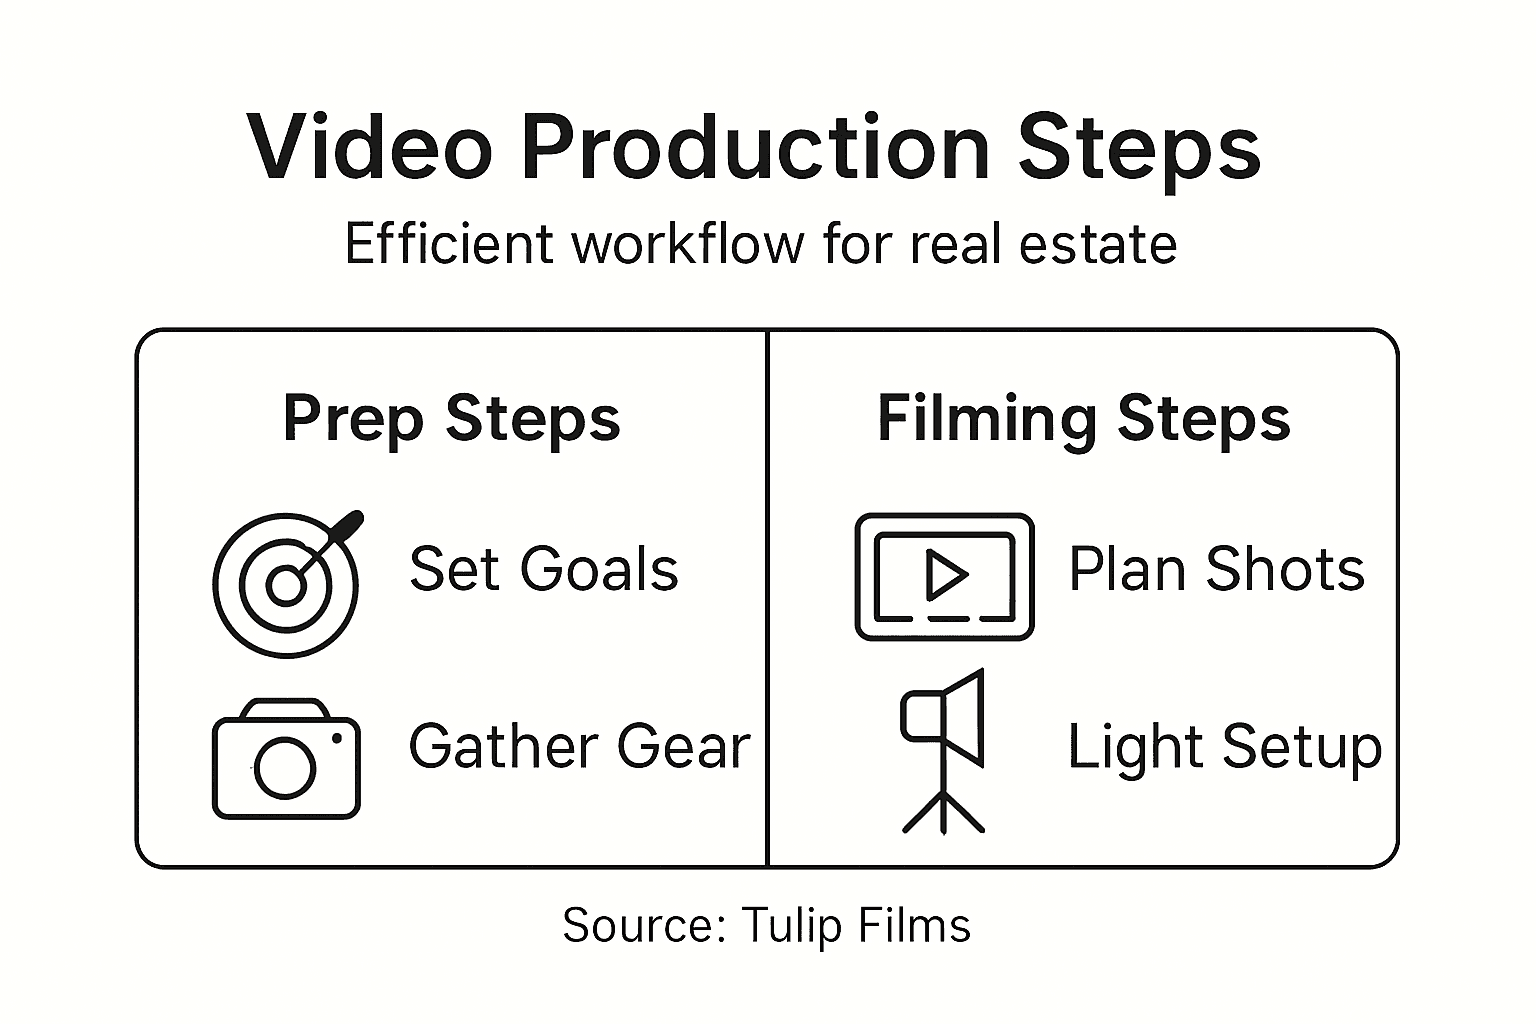
Efficient Video Production Steps for Real Estate Success
- Pieter Nijssen

- Feb 2
- 9 min read
Success in Swiss real estate marketing often hinges on presenting properties with clarity and impact, yet many agencies struggle to translate vision into engaging video content. Efficient video production begins with defining precise project requirements, which research shows is critical for preventing cost overruns and missed expectations. This guide shares practical strategies for capturing client needs, organizing the right team, and shaping standout visual stories that attract the perfect buyer.
Table of Contents
Quick Overview
Important Takeaway | Clarification |
1. Clearly Define Project Goals | Establish client expectations through effective requirement gathering to align video production with their needs. |
2. Organize Equipment and Team | Assemble a well-coordinated team and appropriate equipment to enhance production quality and operational efficiency. |
3. Plan Key Shots Strategically | Create a shot list that emphasizes unique property features, improving viewer engagement through visual storytelling. |
4. Optimize Lighting for Impact | Use effective lighting techniques to enhance property visuals, creating an inviting atmosphere that attracts potential buyers. |
5. Conduct Thorough Final Review | Implement a quality assurance process to ensure the video meets professional standards and accurately represents the property. |
Step 1: Define project requirements and goals
Defining project requirements is your critical first step toward creating a successful real estate video production strategy. This foundational process ensures your project stays aligned with client expectations and delivers precise, targeted audiovisual content.
To effectively outline your project requirements, you’ll want to employ a systematic approach that captures the nuanced needs of your real estate client. Start by conducting a comprehensive initial consultation to understand their specific goals. This involves asking targeted questions about their property portfolio, target audience, and desired messaging. Systematically documenting project requirements helps prevent miscommunication and potential scope creep.
Your requirement gathering should focus on several key dimensions:
Property type and characteristics
Target market demographics
Desired emotional response from viewers
Marketing channels for video distribution
Budget and timeline constraints
Specific visual storytelling preferences
The most effective requirement definition involves collaborative dialogue. Schedule an in-depth meeting where you can walk through specific expectations, review sample videos, and establish clear, measurable objectives. Requirements management principles recommend creating a formal document that outlines these details, serving as a roadmap for your entire video production process.
A well-defined project requirement document prevents misunderstandings and sets clear expectations for both you and your client.
Pro tip: Create a visual requirements template that clients can easily understand and annotate, transforming complex technical specifications into an intuitive graphic representation.
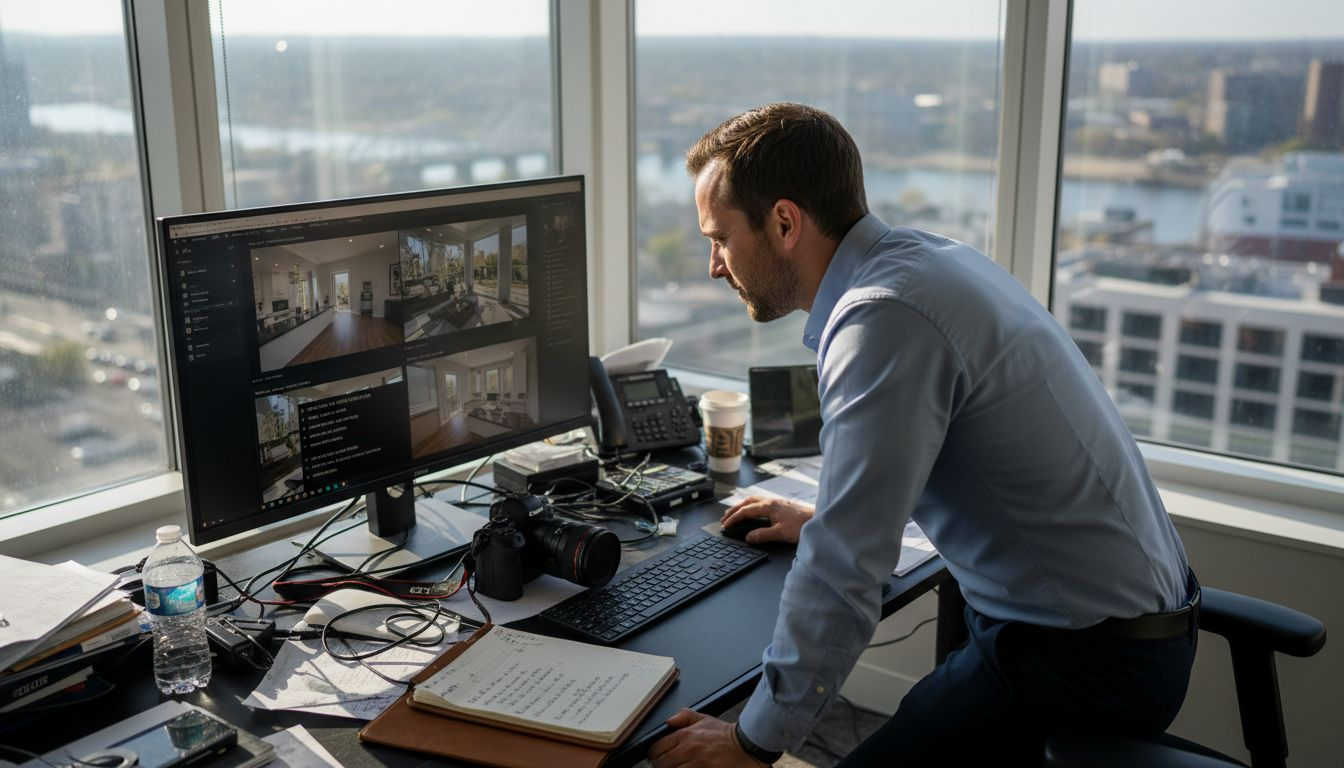
Step 2: Organize equipment and production team
Organizing your equipment and production team is a critical phase that sets the foundation for a successful real estate video project. This step transforms your project from concept to actionable reality by ensuring you have the right tools and talented professionals to bring your vision to life.
Comprehensive production planning involves creating a detailed roadmap that covers every aspect of your video shoot. Start by developing a production bible that includes essential details like equipment inventory, crew contact information, and logistical requirements.
Your production team should include key roles such as:
Camera Operator: Responsible for capturing high-quality property footage
Sound Technician: Ensuring clear audio recording
Lighting Specialist: Creating optimal visual environments
Director: Overseeing creative vision and execution
Production Assistant: Managing logistical details
When selecting equipment, carefully choose cameras and recording tools tailored to real estate videography. Consider specialized gear like stabilizers, drone cameras, and professional lighting setups that can highlight property features effectively.
Successful video production hinges on meticulous preparation and a well-coordinated team that understands their specific roles and responsibilities.
Pro tip: Create a digital equipment checklist with backup options for each critical piece of gear to prevent potential production delays.
Use this reference to understand the business benefits of essential video production roles:
Role | Key Responsibility | Contribution to Video Success |
Director | Oversees creative vision | Maintains consistent style and tone |
Camera Operator | Captures video footage | Ensures visual clarity and detail |
Sound Technician | Manages audio quality | Improves overall viewer experience |
Lighting Specialist | Sets up lighting effects | Highlights property attributes |
Production Assistant | Coordinates logistics | Reduces risk of delays and errors |
Step 3: Plan key shots and property highlights
Planning key shots and property highlights transforms your real estate video from a simple recording to a compelling visual narrative that captures potential buyers’ imagination. This critical step determines how effectively you will showcase the unique characteristics and emotional appeal of the property.
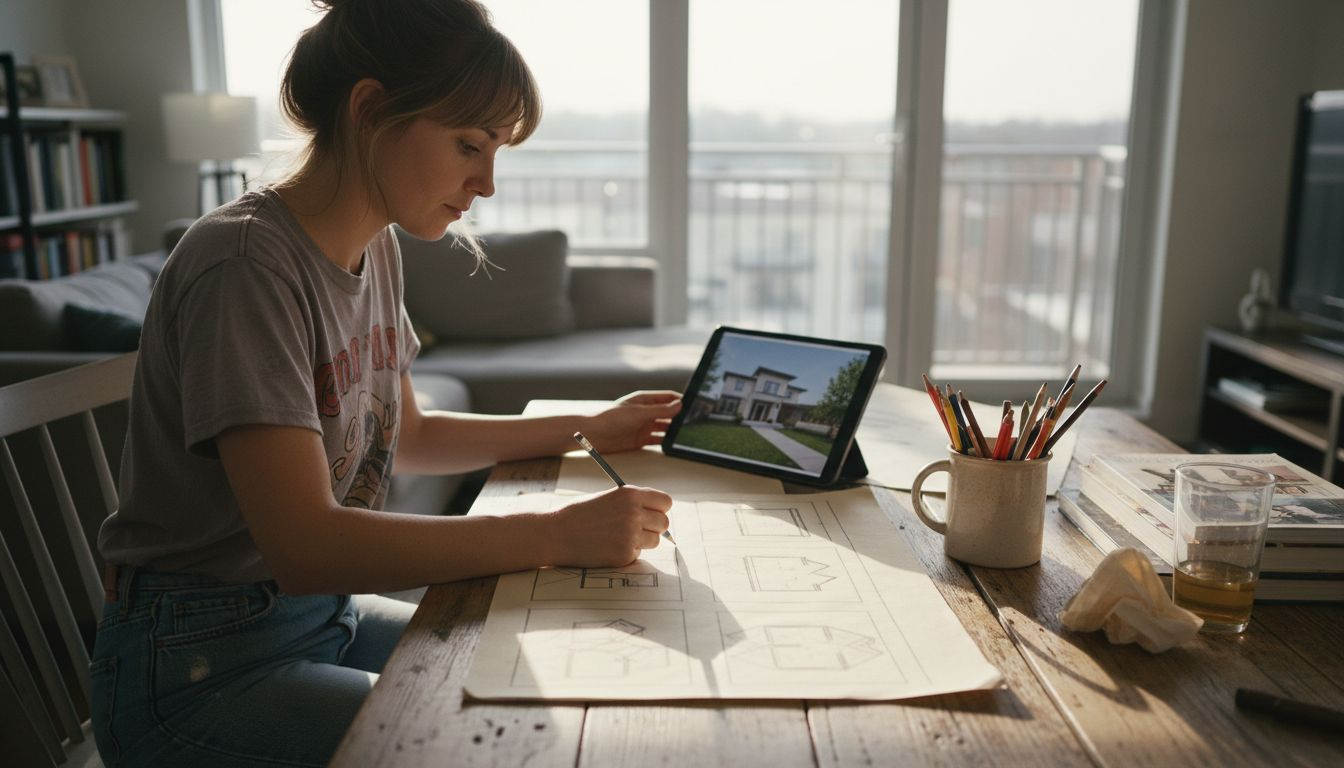
Preproduction planning requires developing a strategic approach to capture the most impactful property features. Start by creating a detailed shot list that systematically outlines the specific angles, rooms, and property elements you want to highlight.
Your shot planning should focus on key visual elements such as:
Exterior Shots: Capturing curb appeal and architectural details
Interior Panoramas: Showcasing spaciousness and room connections
Unique Feature Highlights: Emphasizing standout property characteristics
Natural Lighting Sequences: Demonstrating how light transforms spaces
Lifestyle Suggestion Shots: Helping viewers imagine living in the space
Developing a comprehensive shot documentation enables targeted filming that efficiently captures the property’s most marketable attributes. Consider using varied camera techniques like slow pans, drone footage, and stabilized walking shots to create a dynamic visual experience.
Successful property videos tell a story, not just display a space. Your shot planning should guide viewers through an emotional journey of potential home ownership.
Pro tip: Sketch a basic storyboard that maps out your shot sequence, ensuring you create a narrative flow that builds excitement and reveals the property’s best features progressively.
Step 4: Capture footage with optimal lighting
Capturing footage with optimal lighting is the key to transforming an ordinary real estate video into a stunning visual experience that makes properties shine. Your lighting strategy will dramatically influence how potential buyers perceive and connect with the space.
Video lighting techniques require carefully balancing light sources to enhance property features and create an inviting atmosphere. Start by understanding how different lighting configurations can dramatically alter a room’s perception and emotional impact.
Your lighting setup should address several critical elements:
Natural Light Management: Utilize windows and time of day strategically
Artificial Light Placement: Position lights to eliminate harsh shadows
Color Temperature Consistency: Maintain uniform warmth across shots
Highlight Key Property Features: Use targeted lighting to emphasize unique spaces
Avoid Glare and Overexposure: Control light intensity for balanced visibility
Effective video capture demands adaptive lighting approaches that respond to each room’s unique characteristics. Professional videographers often use a combination of soft box lights, reflectors, and carefully timed natural light to create depth and dimension.
Masterful lighting doesn’t just illuminate a space - it tells a story and invites viewers to imagine themselves living in the property.
Pro tip: Invest in adjustable LED panels with variable color temperatures, allowing you to quickly adapt your lighting setup to different rooms and times of day.
Step 5: Edit and enhance video for clarity
Editing and enhancing your real estate video transforms raw footage into a compelling visual narrative that captivates potential buyers. This crucial stage determines how effectively your property’s unique characteristics will be communicated and perceived.
Video editing techniques involve strategic manipulation of visual elements to create a polished, professional presentation. Begin by reviewing your raw footage and identifying the most impactful sequences that showcase the property’s best features and emotional appeal.
Your editing process should focus on several key enhancement strategies:
Color Correction: Balance and normalize visual tones
Audio Refinement: Clean up sound and add subtle background music
Transition Management: Create smooth scene connections
Stabilization: Remove unwanted camera movements
Narrative Pacing: Control video rhythm to maintain viewer engagement
Advanced editing technologies now allow for sophisticated visual improvements, including removing minor imperfections and creating seamless visual experiences. Professional editing software enables precise adjustments that can dramatically elevate your real estate video’s quality.
Effective video editing is not about perfection, but about creating an authentic and engaging story that resonates with potential buyers.
Pro tip: Always create multiple editing versions and get feedback from colleagues or potential clients to ensure your video effectively communicates the property’s unique value.
Step 6: Review and finalize video for release
Reviewing and finalizing your real estate video represents the critical last mile of your production journey, transforming a promising project into a polished marketing asset. This stage ensures your video meets the highest professional standards and effectively communicates the property’s unique value proposition.
Final video production review involves a systematic and meticulous evaluation of every visual and technical aspect. Conduct a comprehensive quality assurance process that scrutinizes color balance, audio clarity, narrative flow, and overall marketing effectiveness.
Your finalization checklist should include:
Technical Quality Check: Verify resolution and encoding standards
Content Accuracy: Confirm property details and messaging
Client Alignment: Ensure video matches original project brief
Platform Compatibility: Test video performance across different devices
Compliance Review: Verify legal and marketing regulations
Post-production refinement allows for precise adjustments that elevate your video’s professional presentation. This might involve subtle color grading, sound mixing, or adding professional transitions that enhance viewer engagement.
A meticulously reviewed video doesn’t just showcase a property - it tells a compelling story that transforms viewers into potential buyers.
Pro tip: Create a standardized review checklist with weighted scoring to objectively evaluate each aspect of your final video, ensuring consistent quality across all productions.
Here is a summary of how each production step impacts the success of a real estate video:
Production Step | Main Objective | Business Impact |
Define requirements | Capture client goals | Aligns video with expectations |
Organize team and equipment | Ensure proper setup | Increases quality and efficiency |
Plan key shots | Highlight property features | Improves viewer engagement |
Optimize lighting | Enhance visual appeal | Attracts target buyers |
Edit and enhance | Refine raw footage | Boosts professionalism |
Final review | Ensure quality and accuracy | Strengthens market reputation |
Elevate Your Real Estate Marketing with Expert Video Production
Creating a successful real estate video requires clear definitions of project goals, meticulous planning of shots, optimal lighting, and professional editing. If you find yourself challenged by aligning your property’s unique features with compelling visuals or managing every step from equipment to final review, you are not alone. Many real estate professionals struggle to transform raw footage into an engaging narrative that truly attracts buyers and builds emotional connections.
At Tulip Films, we specialize in turning these complex video production steps into seamless, high-quality experiences. Our personalized approach ensures your project requirements are perfectly captured and your property’s story is told with clarity and creativity. From organizing the ideal production team to delivering polished videos ready to captivate your audience, we handle it all with precision and efficiency. Discover how our expertise can resolve your video production challenges and elevate your property listings by visiting Tulip Films.
Looking to boost your real estate presence with expertly crafted videos that highlight every crucial detail and invite viewers to imagine their future home
Get started today with a free consultation at Tulip Films. Explore our portfolio to see how we transform real estate videos into powerful marketing tools. Don’t let the pressure of complex production steps hold you back. Partner with professionals who bring your vision to life and deliver results that inspire.
Frequently Asked Questions
What are the key steps in efficient video production for real estate?
The key steps include defining project requirements, organizing your equipment and team, planning key shots, capturing footage with optimal lighting, editing and enhancing the video, and conducting a final review. Follow these steps systematically to ensure a polished and effective real estate video within your timeline.
How can I define project requirements for my real estate video?
Define project requirements by conducting an initial consultation with your client to gather specific goals, audience demographics, and desired messaging. Create a formal document to outline these details, ensuring all expectations are clear and measurable for efficient production.
What should I consider when organizing my production team?
Consider the specific roles needed for your video, such as camera operator, sound technician, and lighting specialist, ensuring each person understands their responsibilities. Create a detailed production bible that includes contact information and equipment inventory to maintain organization and communication.
How can I effectively plan key shots for my real estate video?
Plan key shots by developing a detailed shot list that outlines specific angles and room highlights you want to capture. Make sure to include both exterior and interior features to create a visual narrative that engages potential buyers and demonstrates the property’s unique qualities.
What lighting techniques enhance real estate video footage?
Enhance video footage by managing natural light effectively and incorporating artificial lighting to eliminate harsh shadows and maintain color consistency. Use soft box lights and reflectors to create a warm, inviting atmosphere that showcases the property features clearly.
Why is it important to review and finalize my real estate video?
Reviewing and finalizing your video ensures technical quality and accuracy while aligning the content with client expectations. Conduct a comprehensive quality assurance check to identify and address any issues before releasing the video to enhance its professionalism and market impact.
Recommended
