How to Showcase Properties on Video for Maximum Impact
- Pieter Nijssen

- Dec 7, 2025
- 9 min read
Over 85 percent of American home buyers say that video tours influence their interest in a property. With so much competition in the real estate market, capturing attention quickly has never been more important for American sellers. This step by step guide reveals exactly how to craft a property video that highlights your best features, connects with viewers emotionally, and turns casual browsers into serious buyers.
Table of Contents
Quick Summary
Key Takeaway | Explanation |
1. Identify Key Selling Points | List the property’s most attractive features to highlight uniqueness and attract buyers. |
2. Plan Storyboard and Schedule | Create a detailed plan for shots and scenes to ensure smooth video production and storytelling. |
3. Optimize Lighting and Staging | Use professional lighting and thoughtful staging to create an inviting atmosphere for viewers. |
4. Capture High-Quality Footage | Ensure steady, cinematic shots with proper stabilization and thoughtful camera movements. |
5. Edit for Professional Presentation | Pay attention to pacing, audio, and transitions to create a polished and engaging final video. |
Step 1: Define the Property’s Key Selling Points
Defining your property’s key selling points is the critical first step in creating a compelling video showcase that will grab potential buyers’ attention and highlight what makes your property unique. This process involves strategically identifying the most attractive and distinctive features that set your property apart from others on the market.
Start by walking through the property with a critical eye and making a comprehensive list of standout attributes. Look beyond basic details like square footage. Consider unique architectural elements, recent renovations, spectacular views, smart home technologies, premium appliances, or exceptional outdoor spaces. Think about what would make someone say “wow” when they first see the property. Are there high ceilings that create an expansive feel? A recently updated kitchen with professional grade appliances? A stunning view of the city skyline or natural landscape? Compelling visual storytelling can transform these features from mere descriptions into emotional selling points.
Pro tip: Rank your identified features from most to least impressive. The top 3-5 features should become the focal points of your video narrative. These are the elements you’ll want to showcase prominently, using cinematic techniques that draw viewers in and make them imagine themselves living in the space. By strategically highlighting these key selling points, you transform a simple property video into a powerful marketing tool that connects with potential buyers on an emotional level.
Once you’ve defined these critical attributes, you’re ready to move on to scripting and storyboarding your property video to ensure these selling points take center stage.
Step 2: Plan Your Video Storyboard and Shooting Schedule
Planning your video storyboard and shooting schedule is a critical step that transforms your property video from a random collection of shots into a compelling narrative. This strategic process ensures you capture every important feature efficiently and create a visually engaging presentation that speaks directly to potential buyers.
Begin by developing a comprehensive visual narrative that maps out each scene and shot in advance. Sketch or digitally create a basic storyboard that outlines the sequence of shots you want to capture. Consider starting with exterior views that showcase the property’s curb appeal, then move systematically through interior spaces. Focus on highlighting those key selling points you identified earlier. For each scene, note specific camera angles, movements, and the emotional tone you want to convey. Will a sweeping drone shot capture the property’s landscaping? Will a smooth tracking shot through the kitchen emphasize its modern design?
Pro tip: Create a precise shooting schedule that accounts for lighting conditions and logistical details. Morning and late afternoon often provide the most flattering natural light for property videos. Allocate specific time blocks for each section of the property, allowing buffer time for reshoots or unexpected challenges. Mastering the pre production process means being prepared with backup equipment, understanding your shot list, and having a clear vision of how each scene contributes to the overall narrative.
Once your storyboard and shooting schedule are complete, you’ll be ready to move into the actual video capture phase with confidence and precision.
Step 3: Set Up Lighting and Staging for Each Room
Lighting and staging are the secret weapons that transform an ordinary property video into a visually stunning showcase that captures potential buyers’ imagination. Your goal is to create an inviting atmosphere that highlights the property’s best features and allows viewers to envision themselves living in the space.
Professional lighting techniques can dramatically enhance the visual appeal of each room. Start by removing clutter and minimizing personal items to create a clean neutral backdrop. Natural light works best, so open curtains and blinds to let soft daylight fill the space. Use additional lighting strategically to eliminate harsh shadows and create depth. Soft fill lights can brighten dark corners, while carefully positioned lamps can add warmth and dimension to living areas. In bedrooms, aim for a soft ambient glow that feels welcoming. For kitchen and bathroom spaces, brighter lighting helps showcase modern fixtures and cleanliness.

Pro tip: Stage each room like a professional interior designer would. Small touches make a big difference subtle adjustments like arranging throw pillows, placing fresh flowers in a vase, or positioning a book on a coffee table can create a sense of lived in comfort. Ensure colors are neutral and appealing avoid personal decor that might distract potential buyers. The key is to create a space that feels both aspirational and attainable something viewers can imagine as their future home.
Once your lighting and staging are perfected, you will be ready to capture breathtaking footage that makes your property irresistible to potential buyers.
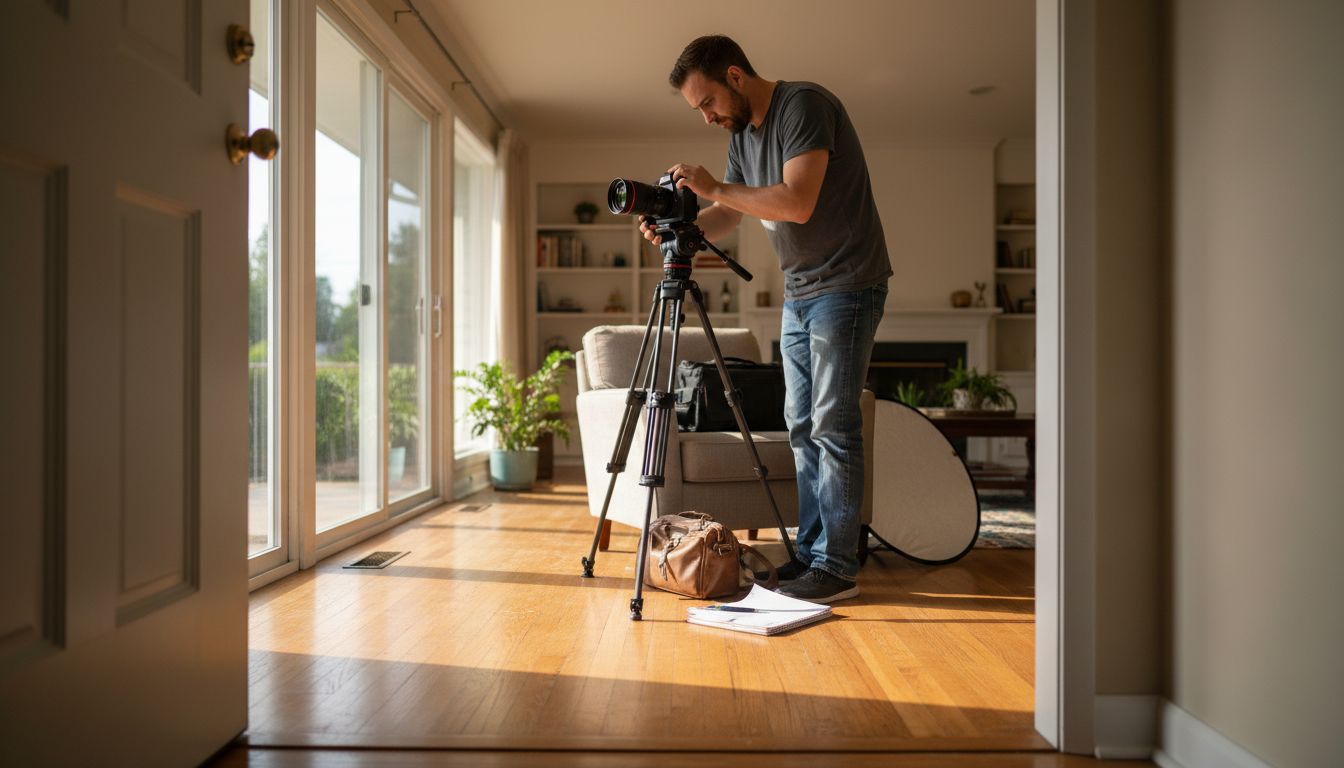
Step 4: Capture High-Quality Video Footage with Steady Shots
Capturing professional-grade property video requires more than just pointing a camera. Your goal is to create smooth, immersive footage that guides potential buyers through the property with cinematic precision and emotional impact.
Professional video techniques demand investing in the right stabilization equipment. A quality tripod or gimbal stabilizer is essential for eliminating camera shake and creating fluid motion. When moving through rooms, use slow deliberate movements that allow viewers to absorb details. Start with wide establishing shots that provide context for each space, then transition to medium and close up shots that highlight specific features. Maintain a consistent height typically around chest or shoulder level to create a natural perspective that mimics how someone would walk through the property.
Pro tip: Practice your camera movements before recording. Walk through your planned route slowly and smoothly, keeping the camera level and maintaining a consistent distance from walls and furniture. Elevate real estate videos with drone techniques can add dramatic exterior shots that showcase the property’s surroundings and architectural context. Remember that each shot should tell a part of the property’s story smooth transitions and thoughtful framing will keep potential buyers engaged and interested.
With your steady shots captured, you will be ready to move into the next phase of creating a compelling property showcase video.
Step 5: Edit and Enhance Video for Professional Presentation
Editing transforms raw footage into a compelling visual story that captivates potential property buyers. Your editing process will turn disconnected shots into a smooth narrative that highlights the property’s most attractive features and creates an emotional connection.
Professional video editing techniques require careful attention to pacing color grading and seamless transitions. Begin by trimming unnecessary footage and arranging shots to create a logical flow that guides viewers through the property. Adjust color and exposure to ensure consistent lighting and vibrant visuals. Use subtle transitions between rooms that feel natural and maintain viewer engagement. Focus on creating a rhythm that allows viewers to absorb details without feeling rushed or bored.
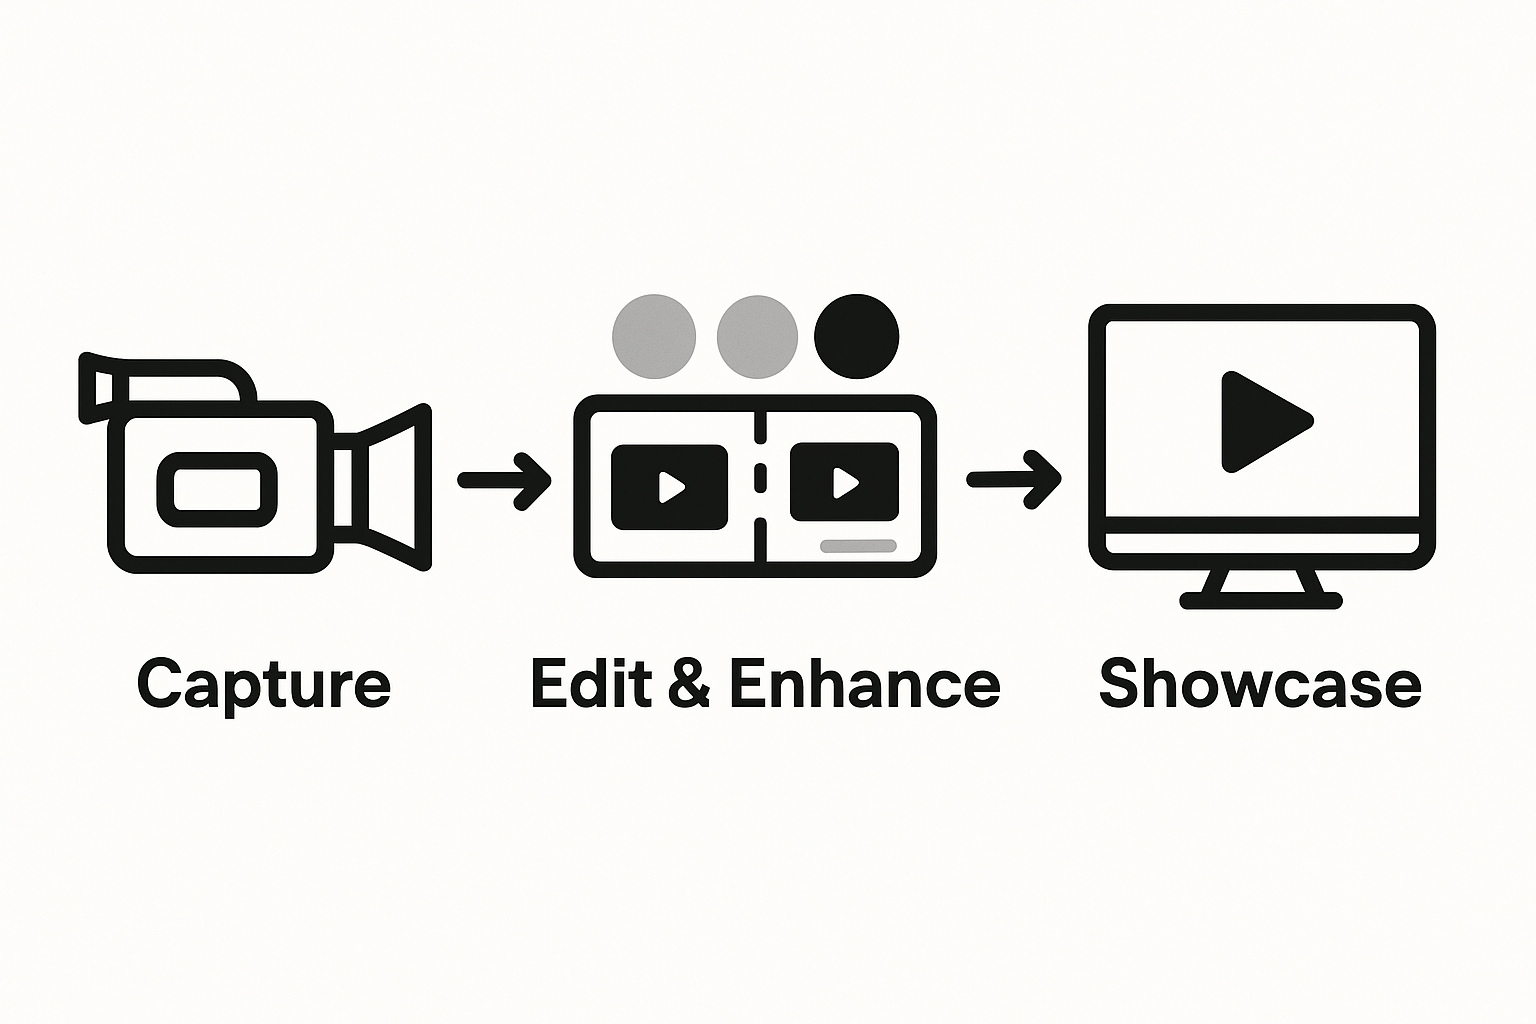
Pro tip: Pay special attention to audio quality. Remove background noise and consider adding soft background music that enhances the property’s atmosphere without distracting from the visual presentation. Understanding post production workflow can help you refine your editing skills and create a polished final product. Aim for a video that is approximately 2 to 3 minutes long perfect for maintaining viewer interest while showcasing all key property features.
With your professionally edited video complete you are now ready to share your compelling property showcase with potential buyers.
Step 6: Review and Optimize the Final Property Video
The final review of your property video is your opportunity to ensure every detail communicates professionalism and captures potential buyers’ imagination. This critical phase transforms your raw footage into a polished marketing tool that showcases the property’s most compelling features.
Professional video optimization techniques require a systematic and critical approach. Watch your video multiple times through different perspectives first as a potential buyer then as a critical editor. Check for technical aspects like color consistency smooth transitions and audio clarity. Ensure the video tells a coherent story that guides viewers naturally through the property. Verify that each shot serves a purpose highlighting unique architectural elements room dimensions or special features that make the property stand out.
Pro tip: Get external feedback from colleagues or potential clients who can provide an unbiased perspective. Master property video storytelling often involves understanding how viewers emotionally connect with visual narratives. Pay attention to pacing some sections might need tightening while others might require slightly longer shots to allow viewers to absorb details. Aim for a video that feels dynamic yet informative keeping potential buyers engaged from start to finish.
With your video now refined and optimized you are prepared to create a powerful visual marketing asset that can attract potential buyers and showcase the property in its best light.
Elevate Your Property Videos with Expert Production
Creating a property video that truly captivates potential buyers demands more than capturing footage. The challenges discussed in the article, like defining key selling points, mastering lighting and staging, and producing steady cinematic shots, are essential but can be overwhelming without the right expertise. Tulip Films understands these critical steps—from planning your storyboard to perfecting the edit—and tailors each project to highlight the unique story behind your property.
Why struggle alone when you can partner with professionals? With our Swiss-based precision and personalized approach, we transform your vision into a stunning video that evokes emotion and inspires buyers to act. Whether you want to integrate dramatic drone shots or need guidance on professional lighting, Tulip Films is here to deliver rapid, high-quality results aligned with your goals.
Ready to showcase your properties at maximum impact? Discover how our video production services combine creativity with technical excellence to produce compelling real estate videos.
Start your journey to more engaging property showcases today by scheduling a free consultation at Tulip Films. Let us help you craft a visual story that makes buyers eager to call your property home.
Frequently Asked Questions
How do I identify key selling points for my property video?
To identify key selling points, conduct a thorough walkthrough of the property and list unique features such as architectural elements, recent renovations, views, and smart technologies. Prioritize the top 3-5 features that stand out and plan to showcase them prominently in your video.
What is the best way to plan a video storyboard for my property?
Start by creating a visual narrative that outlines the sequence of shots you want to capture, including specific camera angles for each room. Develop a shooting schedule that considers lighting conditions and allocates time for each area, ensuring a seamless storytelling experience.
How can I improve lighting and staging for my property video?
Use natural light by opening curtains and blinds, and add soft fill lights to minimize shadows. Stage each room by decluttering and introducing appealing decor to create an inviting atmosphere that helps potential buyers visualize themselves in the space.
What techniques can I use to capture high-quality video footage?
Invest in stabilization equipment such as a tripod or gimbal to achieve steady shots, and practice smooth camera movements as you navigate each room. Use a combination of wide, medium, and close-up shots to effectively highlight the property’s features and create a dynamic viewing experience.
How should I approach the editing process for my property video?
Begin by trimming unnecessary footage and arranging shots to create a logical flow that highlights key features. Focus on achieving consistent lighting and vibrant visuals while ensuring the video is approximately 2-3 minutes long to maintain viewer engagement.
What steps should I take to optimize the final property video?
Review the video multiple times from both a viewer’s and an editor’s perspective to check for technical quality and coherence. Seek feedback from others and make adjustments as necessary to enhance the pacing, ensuring the final product effectively showcases the property.
Recommended
