The Right YouTube Aspect Ratio for Every Type of Video


Upload your video in its native aspect ratio. For standard YouTube uploads, that means 16:9. For Shorts, it means 9:16. YouTube’s player automatically adapts to whatever shape you give it, so there’s no reason to add black bars or force a mismatched frame — the platform does the work of fitting your video to the viewer’s screen, whether that’s a phone held upright or a desktop monitor. If you’re producing a standard long-form video, aim for a native resolution of 1920×1080 and build your entire project around that frame from the start.
A few ground rules before you export anything:
Standard uploads: 16:9, ideally at 1920×1080 or higher
Shorts: 9:16, vertical, full-frame
Never add your own letterboxing or pillarboxing — YouTube’s player handles the framing
Match your project’s canvas to your intended output before you start editing, not after
Key Takeaways
Matching your aspect ratio to your primary viewing platform before production begins matters more than any export setting applied afterward.
Point | Details |
Default to 16:9 | Standard YouTube uploads should target 1920×1080 or higher for the cleanest playback. |
Shorts need 9:16 | Vertical 1080×1920 renders are required; don’t crop a landscape master as a substitute. |
Fix PAR before export | Normalize to square pixels (PAR 1.0) to avoid the most common cause of stretched or pillarboxed video. |
Plan multi-format delivery early | Create separate landscape, vertical, and square renders rather than forcing one file to serve every platform. |
Frame for the destination, not habit | Decide the primary viewing context before shooting, since cropping after the fact loses composition control. |
Table of Contents
Which Aspect Ratio Should You Use on YouTube?
Four ratios cover almost everything you’ll ever upload: 16:9, 9:16, 1:1, and 4:3. Each one exists because a specific screen or feed demands it, and picking the wrong one means your video gets cropped, shrunk, or surrounded by bars you never intended.
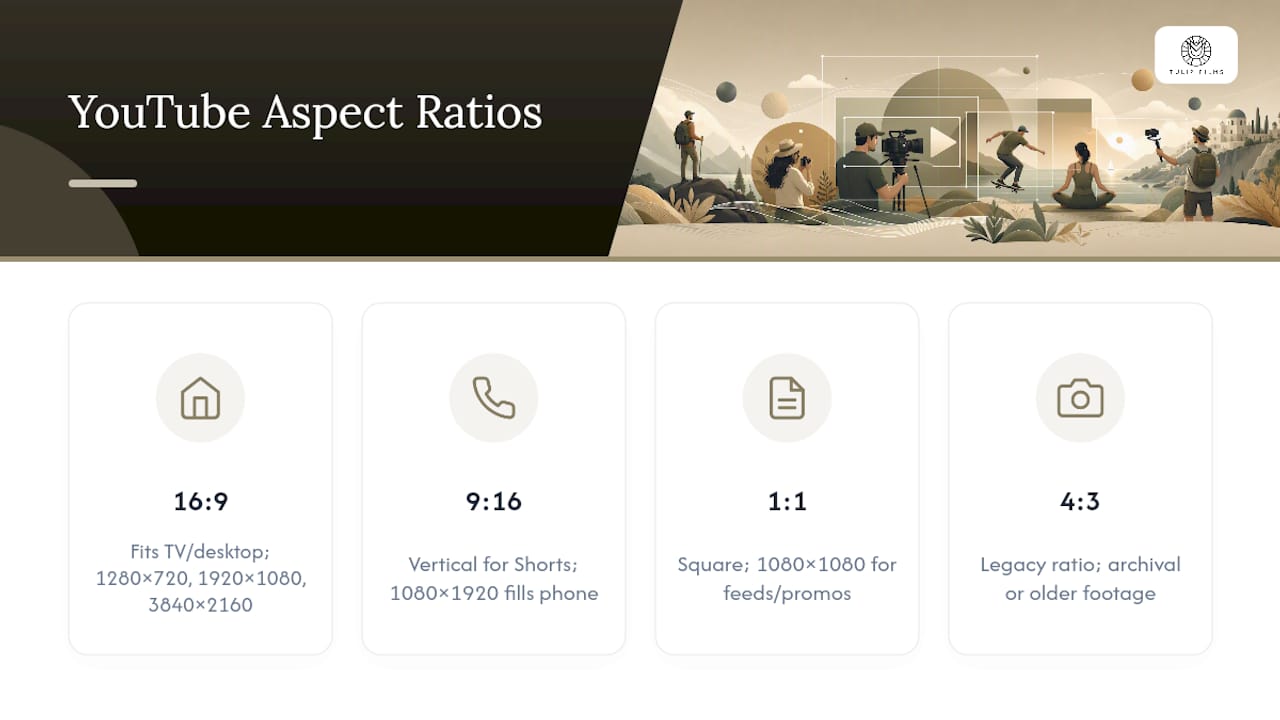
16:9 is the default for long-form YouTube content, the shape that fits a TV, a laptop screen, or a desktop monitor without any visual compromise. If you’re producing a tutorial, a vlog, a product review, or anything meant to be watched sitting down, this is your frame. Standard resolutions run 1280×720 (HD) and 1920×1080 (Full HD), with 3840×2160 (4K) becoming the norm for anyone delivering premium content.
9:16 flips that logic for phones held vertically. This is the format for YouTube Shorts and just about anything meant to be watched while scrolling. A vertical render at 1080×1920 fills the entire phone screen with no wasted space, which is exactly why vertical delivery has become the de facto standard for mobile-first platforms.

1:1 (square, 1080×1080) still shows up in feed-based placements and works well for short promotional clips shared across multiple platforms at once. 4:3 is largely a legacy ratio at this point, tied to older broadcast and camera formats, but it still surfaces when creators are working with archival footage.
If your content is going to live primarily on mobile, don’t force it into 16:9 and hope viewers tilt their phones. Shoot and edit for the frame the audience will actually see.
How Does YouTube Handle Non-Standard Aspect Ratios?
YouTube’s player doesn’t force every video into one fixed box. It reads the file’s native shape and adjusts the display to match, which is why two videos with wildly different dimensions can both look correct on the same channel. The standard aspect ratio for YouTube on a computer is 16:9, and if your video has a different aspect ratio, the player automatically changes to the ideal size to match your video and the viewer’s device.
Here’s what that adaptation actually looks like in practice:
Upload a 9:16 vertical video to standard YouTube (not Shorts), and desktop viewers will see it centered with black bars on either side, known as pillarboxing.
Upload a wide cinematic frame like 2.39:1, and you’ll get letterboxing, thin black bars above and below, on standard 16:9 screens.
Shorts get their own dedicated surfacing entirely separate from the regular feed, built specifically for full-screen vertical playback with no bars at all.
End screens, cards, and suggested-video overlays are all designed around the 16:9 canvas, so a vertical video uploaded outside the Shorts pipeline can end up with UI elements crowding an already narrow visible frame.
Pro Tip: If you’re repurposing a 16:9 video into a 9:16 Short, don’t just crop the edges and hope for the best. Reframe manually so the subject stays centered, especially if there’s text or a face near the edge of the original frame.
What Export Settings Keep Your Aspect Ratio Correct?
Most stretching and pillarboxing problems trace back to one mistake: mismatched pixel dimensions versus intended display shape. The fix is simpler than it sounds. A frequent technical cause of stretched playback is mixing pixel aspect ratio (PAR) and display aspect ratio (DAR), and modern workflows should normalize to square pixels with a PAR of 1.0.
Here’s the distinction in plain terms: PAR describes the shape of each individual pixel, while DAR describes the shape of the final displayed frame. Decades ago, some broadcast formats used non-square pixels to save file size, which is where a lot of legacy stretching issues came from. Nearly every modern camera, editor, and platform assumes square pixels by default, so unless you’re working with old anamorphic footage, you can generally ignore PAR entirely by making sure your project settings never touch it.
For your actual render settings:
1080p (1920×1080): target a suitable bitrate optimized for standard frame rates, higher if there’s fast motion or fine detail
4K (3840×2160): target a higher bitrate for 4K resolution to balance quality and file size
Codec/container: H.264 in an MP4 wrapper for maximum compatibility across devices and platforms; HEVC in MP4 or MOV when you need smaller 4K files and know your delivery pipeline supports it
Scan and color: progressive scan, standard color space (Rec. 709 for SDR content), never interlaced
YouTube’s own guidance backs this up directly: for professional or monetized content, the platform recommends a minimum native resolution of 1920×1080 to preserve quality once the video gets compressed down through YouTube’s adaptive bitrate ladder.
If you’re delivering to multiple destinations, don’t try to make one file do everything. Export a 16:9 master for the main upload, then create a separate 9:16 render for Shorts and a 1:1 version if you’re also posting to feed-based platforms. Planning that from the export stage saves you from reverse-engineering crops later.
How to Set Aspect Ratio in Your Editing Software
Getting the frame right starts before you touch a single clip. Set your sequence or project canvas first, then build the timeline around it.
Premiere Pro: create a new sequence, open sequence settings, and manually set frame size (1920×1080 for 16:9, 1080×1920 for vertical) before importing footage.
Final Cut Pro: set your project’s format and resolution in the project settings panel; Final Cut will conform footage to match, but starting with the right canvas avoids extra reframing work.
DaVinci Resolve: set timeline resolution in Project Settings under “Master Settings” before you start cutting, since changing it midway can shift existing clip positioning.
Mobile editors (CapCut, InShot): most default to vertical canvases automatically, but check the canvas selector before you start; it’s easy to build an entire cut on the wrong shape.
If you’re working with older 4:3 or non-square footage, decide upfront whether you’re pillarboxing it inside a 16:9 frame or reframing manually to fill more of the screen. For a deeper walkthrough of setting up sequences correctly before you start cutting, see this guide to the video editing process.
Pro Tip: Lock your canvas resolution as the very first step in any new project. Changing it after you’ve already placed clips on the timeline almost always introduces scaling artifacts you’ll have to fix by hand.
What Should You Check After Uploading to YouTube?
Uploading isn’t the finish line. A quick post-upload check catches problems before viewers do.
Open YouTube Studio and check the video’s technical details to confirm the resolution and aspect ratio match what you exported.
Preview the video on an actual phone in portrait mode and on a desktop browser, not just the Studio preview window.
Check end screens and cards for overlap, especially on vertical uploads where the standard 16:9 overlay positions can crowd a narrower visible frame.
Confirm captions, lower-thirds, and any text graphics stay inside the safe area on both a small phone screen and a large monitor.
If you uploaded a Short, verify it’s actually surfacing in the Shorts feed and not just sitting in your regular uploads as an oddly-shaped video.
Catching a misplaced end screen or a caption running off-screen takes two minutes and saves you from a comment section full of “why is half your video cut off.”
The Tulip Films Approach to Multi-Format Delivery
Every project we deliver starts with a native-resolution 16:9 master, shot and cut with the final aspect ratio decided before the camera ever rolls. That discipline matters more than most creators assume.
We’ve watched clients try to stretch a single edit across YouTube, Instagram, and LinkedIn, and it never looks right anywhere. The fix isn’t a better crop. It’s planning the shot list around the destinations from day one.
Our standard workflow includes:
A landscape 16:9 master delivered at minimum 1920×1080, built for standard YouTube playback
Separate vertical 9:16 crops or reframes for Shorts and social, cut independently rather than auto-cropped from the master
Square 1:1 versions when a campaign calls for feed placement alongside the main video
Multi-format delivery isn’t an add-on service tacked onto a single edit. It’s a separate creative pass, because what reads clearly in a wide 16:9 frame often needs entirely different composition in a tall vertical one.
If you’re running a campaign that needs to land on YouTube, Shorts, and social simultaneously, Tulip Films’ advertising and marketing video production is built around exactly this kind of multi-format planning from the first consultation.
Does Aspect Ratio Affect Viewer Engagement and Watch Time?
Aspect ratio shapes engagement indirectly, mostly through how comfortable the video is to watch on the device someone’s actually holding. A 16:9 video forced onto a phone screen at a fraction of its potential size, with the viewer having to tilt their device to watch comfortably, creates friction that a properly framed vertical video doesn’t. Friction costs you watch time, because every extra tap or awkward angle is a chance for someone to swipe away.
Shorts made this dynamic impossible to ignore. Vertical, full-screen playback removed the tilt-your-phone barrier entirely, and that frictionless format is a major reason short-form vertical content spread as fast as it did across every platform that added a version of it. The lesson for long-form creators isn’t that everything needs to be vertical. It’s that matching the frame to the expected viewing context removes a small but real obstacle between your video and a completed view.
Composition matters just as much as raw dimensions. A 16:9 video shot with the subject centered and readable at small sizes performs better on mobile than one relying on wide establishing shots that only work on a large screen, even though both are technically the same aspect ratio. If your audience skews mobile, and YouTube’s own analytics will tell you that quickly, framing tighter and keeping key visual information away from the edges protects watch time regardless of which ratio you ultimately choose.
The safest bet remains matching your ratio to your primary viewing context, then composing within that frame with mobile legibility in mind even on a 16:9 canvas.
Does Aspect Ratio Affect Monetization and Ad Formats?
Aspect ratio interacts with monetization mainly through resolution requirements and ad placement compatibility, not through some hidden algorithmic preference for one shape over another. YouTube’s ad system places overlay ads, skippable pre-rolls, and mid-rolls based on standard 16:9 assumptions, so a properly formatted landscape upload gives the platform’s ad delivery system the cleanest canvas to work with.
Resolution plays a bigger role here than most creators realize. YouTube recommends a minimum of 1920×1080 for content in sales or rental categories, a threshold that exists because premium and monetized placements need to hold up across YouTube’s adaptive bitrate ladder without visible quality loss. Upload a soft, low-resolution 16:9 file and it can still monetize, but it competes at a disadvantage against sharper competing content in ad auctions and recommendation slots.
Shorts monetize through a separate revenue-sharing structure built around the Shorts Fund and ad revenue models specific to that format’s short vertical viewing sessions, rather than the standard pre-roll and mid-roll model used on long-form video. That means a creator splitting output between long-form 16:9 and vertical Shorts is effectively managing two distinct monetization tracks, each with its own technical expectations, rather than one unified system with a single aspect ratio requirement.
The practical takeaway: deliver clean, native-resolution masters in the correct ratio for each format, and let the platform’s existing ad infrastructure do its job rather than trying to outsmart it with unconventional framing.
What Are the Aspect Ratio Rules for YouTube Shorts?
Shorts require vertical 9:16 framing, and the platform treats this as a firm expectation rather than a loose suggestion. Upload a horizontal 16:9 video and tag it as a Short, and YouTube will either reject the Shorts classification or display it with heavy pillarboxing that defeats the entire point of the format.
The practical resolution target is 1080×1920, matching the full-screen vertical display most phones use. YouTube’s own community guidance addresses adjusting video dimensions specifically for short-form vertical content, reinforcing that this isn’t a ratio you can approximate with a crop after the fact.
There’s a length constraint bundled in with the format too, and unlike the aspect ratio requirement, this one changes periodically as YouTube expands what counts as a Short. Beyond the technical spec, Shorts occupy a separate surfacing system entirely: a dedicated vertical-scroll feed, distinct recommendation logic, and UI overlays (like buttons and captions) positioned specifically for a full-screen vertical frame.
The most common mistake creators make isn’t picking the wrong ratio. It’s treating a Short as an afterthought crop of a long-form video rather than as its own edit. Text sized correctly for a 1920×1080 timeline often becomes unreadable when squeezed into a 1080-pixel-wide vertical frame, and pacing that works over five minutes of landscape viewing rarely survives the compression into fifteen seconds of vertical scroll-stopping content. Treat the Short as a separate creative decision, built on its own vertical canvas from the first cut, not a resize of something else.
Can Unconventional Aspect Ratios Still Succeed on YouTube?
Plenty of high-performing content ignores the standard playbook entirely, and it works because the creator chose the ratio deliberately rather than by accident. Ultrawide cinematic releases using ratios like 2.39:1 show up regularly on YouTube from film studios and trailer channels, delivered with intentional letterboxing inside a 16:9 frame because the creative choice (a wide, theatrical look) matters more than filling every pixel of a viewer’s screen.
Square 1:1 videos have carved out a real niche in tutorial and recipe content, where the format’s efficient use of vertical scroll space on mobile feeds gives it a practical edge over standard widescreen, even outside dedicated square-video platforms. The square shape keeps hands, ingredients, or a workspace fully visible without wasted headroom above or below the action, which is exactly the kind of framing decision that pays off when the content itself benefits from it.
Vertical 9:16 has moved well beyond Shorts, too. Interview and podcast channels increasingly cut full vertical versions of long-form conversations specifically for mobile viewers who never tilt their phone sideways, treating the vertical frame as a primary format rather than a Shorts-only obligation.
The pattern across all of these examples is the same: the aspect ratio serves a specific viewing context or creative intent, not habit. Vertical delivery works because it matches how mobile-first platforms and audiences actually consume the format, the same logic that makes 2.39:1 work for trailers and 1:1 work for recipe tutorials. Pick your ratio based on where the video will actually be watched, not based on what feels like the default choice.
What Actually Matters Most in All This
Most guidance on aspect ratio treats it like a technical checkbox: pick 16:9, hit export, move on. That’s not wrong, but it undersells how much of the real damage happens earlier in the process, at the shoot itself, not the export settings.
The conventional advice focuses heavily on fixing PAR mismatches and picking the right codec, which matters, but assumes the footage was framed correctly in the first place. In practice, the bigger failure point is creators shooting everything in landscape by default and only thinking about vertical delivery during the edit, by which point they’re cropping and losing composition control rather than framing with intent from the start.
If there’s one thing worth prioritizing over every export setting in this article, it’s deciding your primary destination before you shoot a single frame. A video built for Shorts from the ground up will always outperform a 16:9 video awkwardly cropped into 9:16 after the fact, no matter how clean your bitrate settings are.
— Pieter
Sources
Recommended
