One Clear CTA: YouTube Channel Trailer Template & Metrics for Creators

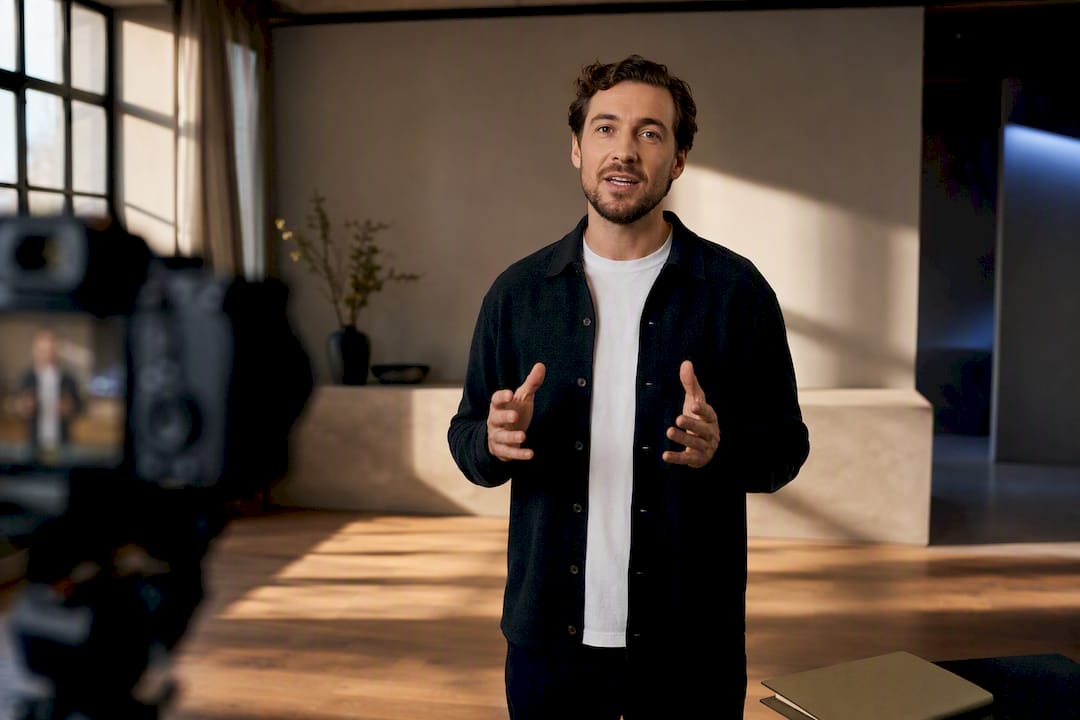
A YouTube channel trailer is the short video that greets anyone who lands on your channel page without having subscribed yet, and its only job is to turn that visit into a subscription. The fastest path there: build a short trailer that hooks viewers quickly and closes on exactly one call to action. Everything below covers how to write it, shoot it, upload it, and track whether it actually works.
TL;DR:
A well-structured trailer should have a hook in the first three seconds, a clear value proposition, proof of your results, and a single, focused call to action.
Use high-quality audio and lighting, cut quickly, and burn captions into the footage to keep viewers engaged and ensure the message lands even when muted.
Upload the trailer as unlisted for review, then set it in YouTube Studio’s customization section, and verify it appears correctly before publishing.
Monitor early audience retention, end-screen click-through rates, and subscriber increases to evaluate and refine trailer effectiveness over time.
Consider professional production if your channel is a key brand impression, needs multiple formats, or if tight deadlines justify outsourcing scripting, filming, and editing.
Table of Contents
What Is a YouTube Kanaltrailer and Why Does It Matter?
Creating a YouTube Kanaltrailer (channel trailer) means building the specific video that plays automatically on your channel’s home tab for anyone who hasn’t clicked subscribe. It’s separate from your regular uploads, and YouTube treats it that way in the backend.
There’s a second layer most creators miss: YouTube lets you assign a different video, called Spotlight, to viewers who have already subscribed. That split matters. A first-time visitor needs to be convinced you’re worth following; a returning subscriber already knows you and wants your latest or best content instead.
Trailers target cold traffic: people arriving from search, recommendations, or a shared link.
Spotlight targets warm traffic: subscribers checking back in.
A trailer built for the wrong audience (say, an inside joke only regulars get) wastes the one shot you have at a first impression.
Businesses using YouTube for brand marketing often underestimate this distinction, treating the trailer slot like just another video upload instead of a dedicated conversion tool.
The Four-Part Structure Behind Every Trailer That Converts
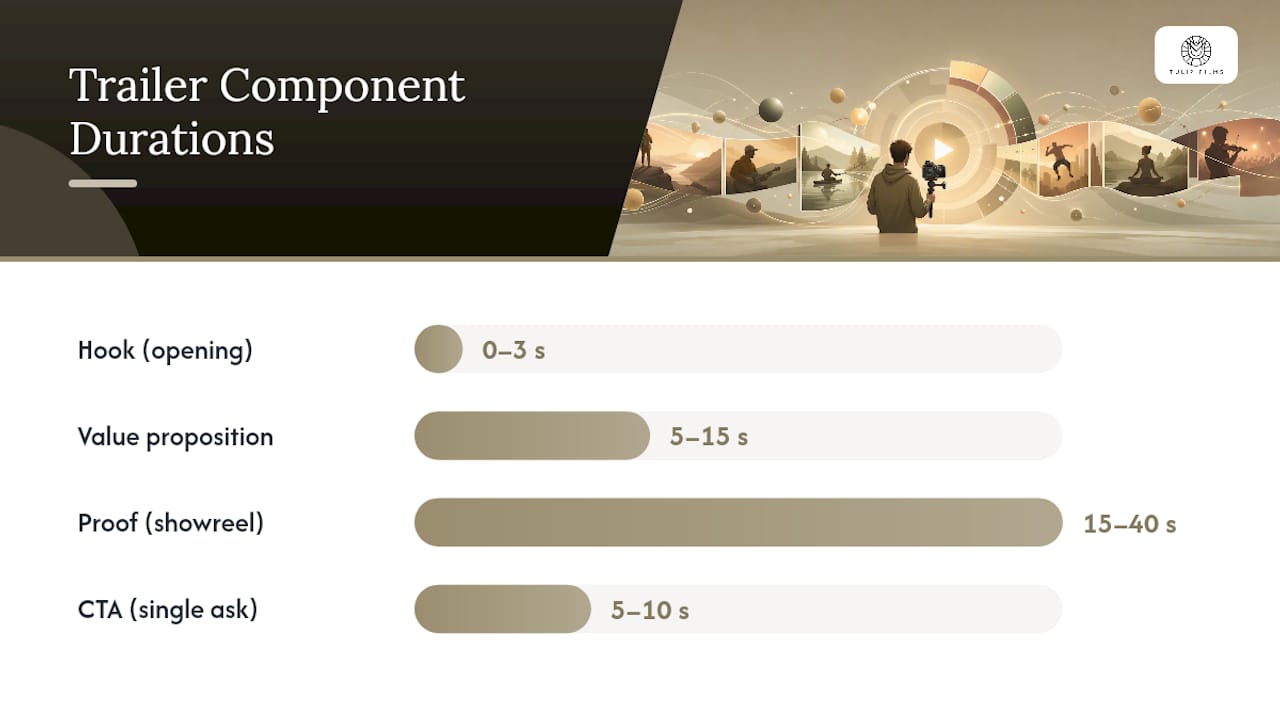
The trailers that actually turn strangers into subscribers follow a consistent shape: hook, value proposition, proof, and one call to action. That structure holds up across tested conversion frameworks, and it works because each part does a distinct job in a very short window.
Hook (0 to 3 seconds). Open on your strongest visual or boldest claim. No logo animation, no slow fade in. Viewers decide whether to keep watching almost instantly.
Value proposition (roughly 5 to 15 seconds). State plainly what the channel is about and who it’s for. “I show small restaurant owners how to shoot menu videos on a phone” beats a vague mission statement.
Proof (15 to 40 seconds). Quick cuts of your best moments, biggest results, or most-watched clips. This is where a showreel-style highlight reel approach works well, since it’s built to prove quality fast.
CTA (final 5 to 10 seconds). One instruction. “Subscribe if you want a new video every Tuesday.” Not three instructions. One.
Here’s a script skeleton you can fill in directly:
[0:00 to 0:03] Bold opening line or striking clip.[0:03 to 0:15] “I’m [name], and I help [audience] do [outcome].”[0:15 to 0:40] Three fast clips showing your best work or results.[0:40 to 0:55] “New videos every [frequency]. Subscribe to [specific benefit].”
Pro Tip: Resist the urge to add a second CTA “just in case.” A single, clear instruction consistently produces better end-screen click behavior than stacking multiple asks, because viewers act on the first clear signal and ignore the rest.
Trailers also age. Swap yours out every few months so it reflects your current content and doesn’t look abandoned to new visitors.
Production Checklist: Filming, Captions, and Export Settings
A trailer that sounds bad or looks shaky undercuts a great script. Keep the technical side simple but deliberate.
Filming basics:
Use an external mic or lavalier. Built-in laptop or phone audio makes even good writing sound amateurish.
Film near a window or with a basic light panel facing you, not behind you.
Frame tight, chest-up shots for talking segments; save wide shots for B-roll.
Editing choices that matter more than people expect:
Cut fast. Dead air kills a 45-second video.
Burn subtitles directly into the footage rather than relying on YouTube’s caption toggle. Trailers autoplay muted for most visitors, and creator best practices consistently point to burned-in text as the difference between a message that lands and one that disappears silently.
Keep background music around 20 to 30% volume under your voice so it never competes with dialogue.
Before you export: design a thumbnail that reads clearly at a small size, and export at 1920×1080, 30fps, so it plays cleanly across devices. Free tools like Clipchamp handle basic trims, captions, and export presets without a steep learning curve, which makes them a reasonable starting point if you’re editing this yourself.
How Do You Upload and Set a Channel Trailer in YouTube Studio?
Once your video is edited, assigning it as your trailer takes only a few clicks inside YouTube Studio.
Upload the finished video as unlisted first if you want to preview it before going live, or public if you’re ready to launch.
Go to Customization → Layout, then find the Video spotlight section.
Select your new video for the “For new visitors” trailer slot.
Separately, choose a video (often a recent upload or a fan favorite) for the “For returning subscribers” Spotlight slot.
Save. Changes to your channel layout publish immediately, no review delay.
Confirm it worked by viewing your channel page signed out or in an incognito window, which shows exactly what a first-time visitor sees.
That last step catches more mistakes than any other, since it’s easy to assume your trailer is live when a setting didn’t save correctly.
Which Metrics Tell You the Trailer Is Working?
YouTube Analytics gives you enough signal to know whether your trailer is pulling its weight, if you check the right numbers. Open Content → Videos, select your trailer, and watch three things.
Early audience retention (first 5 to 15 seconds). A steep drop here means your hook isn’t earning attention. Rewrite the opening line before touching anything else.
End-screen click-through rate. Low clicks usually point to a CTA problem: it’s unclear, buried, or competing with other on-screen elements. YouTube’s own content reports break this down by video, so you can isolate the trailer specifically rather than guessing from channel-wide numbers.
New-subscriber lift in the days after a trailer swap, compared to your baseline.
Once you’ve got a baseline, test one variable at a time: swap the thumbnail, try 30 seconds against 60, or test a different CTA phrase. Small, isolated tests tell you what actually moved the needle instead of guessing.
When Should You Hire a Professional Instead of DIY?
DIY works fine for a first pass, but certain situations shift the math toward hiring it out. If your channel is a brand’s first real impression on a potential customer, if you need the same footage cut into multiple formats (trailer, ads, social clips), or if you’re on a deadline that doesn’t leave room for a second attempt, a production partner earns its cost back quickly.
What a team typically adds beyond what most solo creators can produce alone:
Scripting that’s tightened for pacing, not just written and read aloud.
Professional shooting: proper lighting, stabilized footage, multiple angles.
Color grading and audio mixing that make the final product feel finished, not homemade.
Subtitle design and end-card layout that match your brand instead of using default templates.
If you’re weighing that route, a solid brief includes your target audience, desired trailer length, and two or three channels whose trailers you admire stylistically. That’s usually enough for a production team to hit the mark on a first draft. Companies leaning on video for brand marketing tend to see the trailer as one piece of a bigger visual identity, not a standalone task.
What Actually Moves the Needle on Trailer Conversion
Most advice on this topic obsesses over production polish: better cameras, slicker transitions, fancier graphics. That’s not wrong, but it’s not where the leverage is either. The trailers that convert best usually win on structure and restraint, not gloss. A phone-shot trailer with a sharp three-second hook and one clean CTA will out-convert a beautifully lit video that buries its point at the 40-second mark.
The place most creators actually lose subscribers is the CTA. It’s tempting to ask viewers to subscribe, follow on Instagram, and check the link in bio, all in the same breath. Every additional ask dilutes the first one. One instruction, repeated with confidence, beats three competing for attention.
If you’re prioritizing anything first, prioritize the hook and the single CTA over everything else. Get those two elements right, and a modest production budget will still perform. Get them wrong, and no amount of visual polish saves the trailer.
— Pieter
Tulip Films: A Trailer Built to Convert, Not Just Look Good
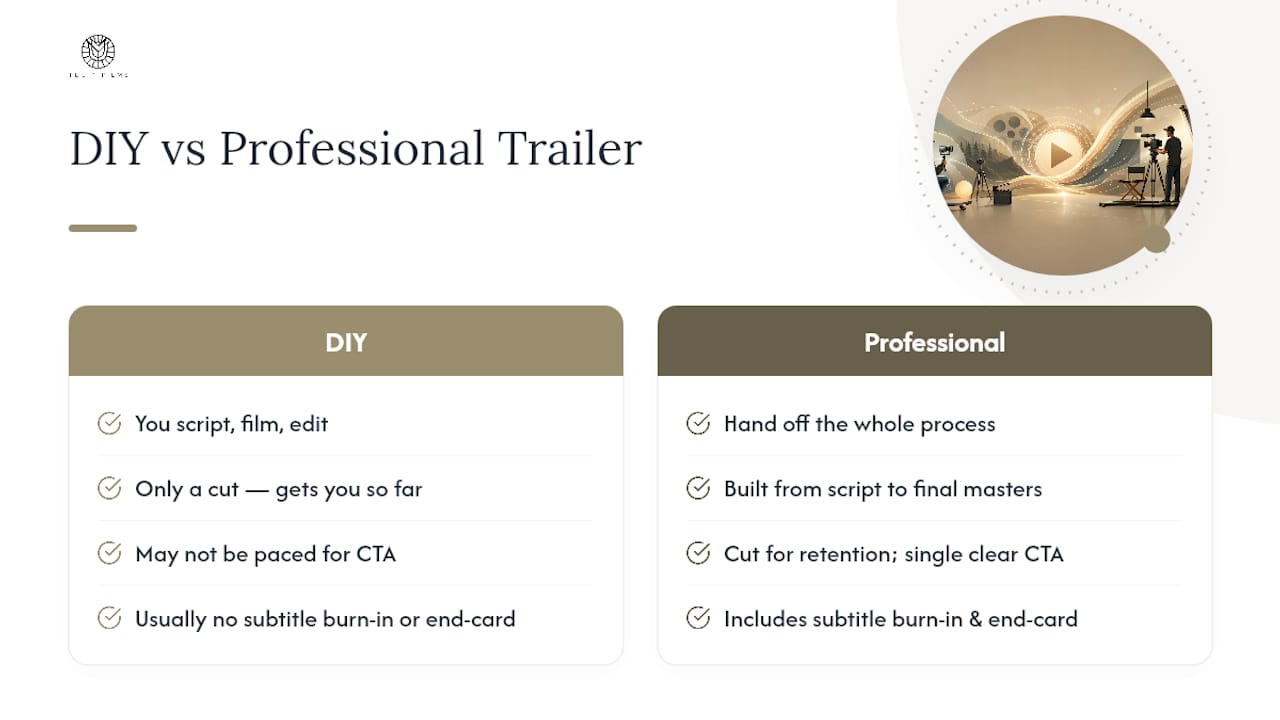
If your channel trailer is doing double duty as a brand’s first impression, a DIY cut only gets you so far. A professional video production service is the alternative to piecing it together yourself: instead of juggling scripting, filming, and editing solo, you can hand off the whole process and get back a trailer built from script to final masters, cut for retention and paced around a single clear CTA.
[
A consultation is straightforward. Provide your target audience, the length you’re aiming for (30 to 60 seconds works well for most channels), and two or three channels whose trailers you like stylistically. From there, the video production team can script, shoot, and finish the video, including subtitle burn-in and end-card design, so it’s ready to drop straight into the Video spotlight slot in YouTube Studio.
Browse the production portfolio to see finished examples, or check the pricing page for package details before requesting a quote.
Where These Steps and Templates Come From
The Studio steps above follow YouTube’s own channel layout guide. The script structure and timing cues draw on tested trailer templates and conversion-focused best practices, plus guidance on subtitle and slot strategy for brand channels. For deeper storytelling technique, see this guide to video storytelling for brands.
Sources
Recommended
