Master the Video Editing Process for Pro Results
- Pieter Nijssen

- Dec 3, 2025
- 7 min read
Over half of american creators struggle with organizing their video projects before editing even begins. The challenge of transforming scattered clips and audio files into a professional video is all too familiar. Knowing how to plan your workflow and manage each step can save hours and prevent costly mistakes. This guide breaks down proven strategies to help american editors achieve smooth results from first draft to final export.
Table of Contents
Quick Summary
Key Takeaway | Explanation |
1. Define clear project goals | Establish what story you’re telling and who your audience is to guide your video editing process. |
2. Organize media assets effectively | Use a structured folder system for footage and resources to enhance accessibility during editing. |
3. Customize your editing workspace | Arrange panels and tools in your software for efficient workflow and a comfortable creative environment. |
4. Utilize strategic visual enhancements | Apply effects and color grading thoughtfully to enhance your video’s storytelling without distractions. |
5. Review export settings before sharing | Choose the correct export settings for your distribution platform to maintain quality and performance. |
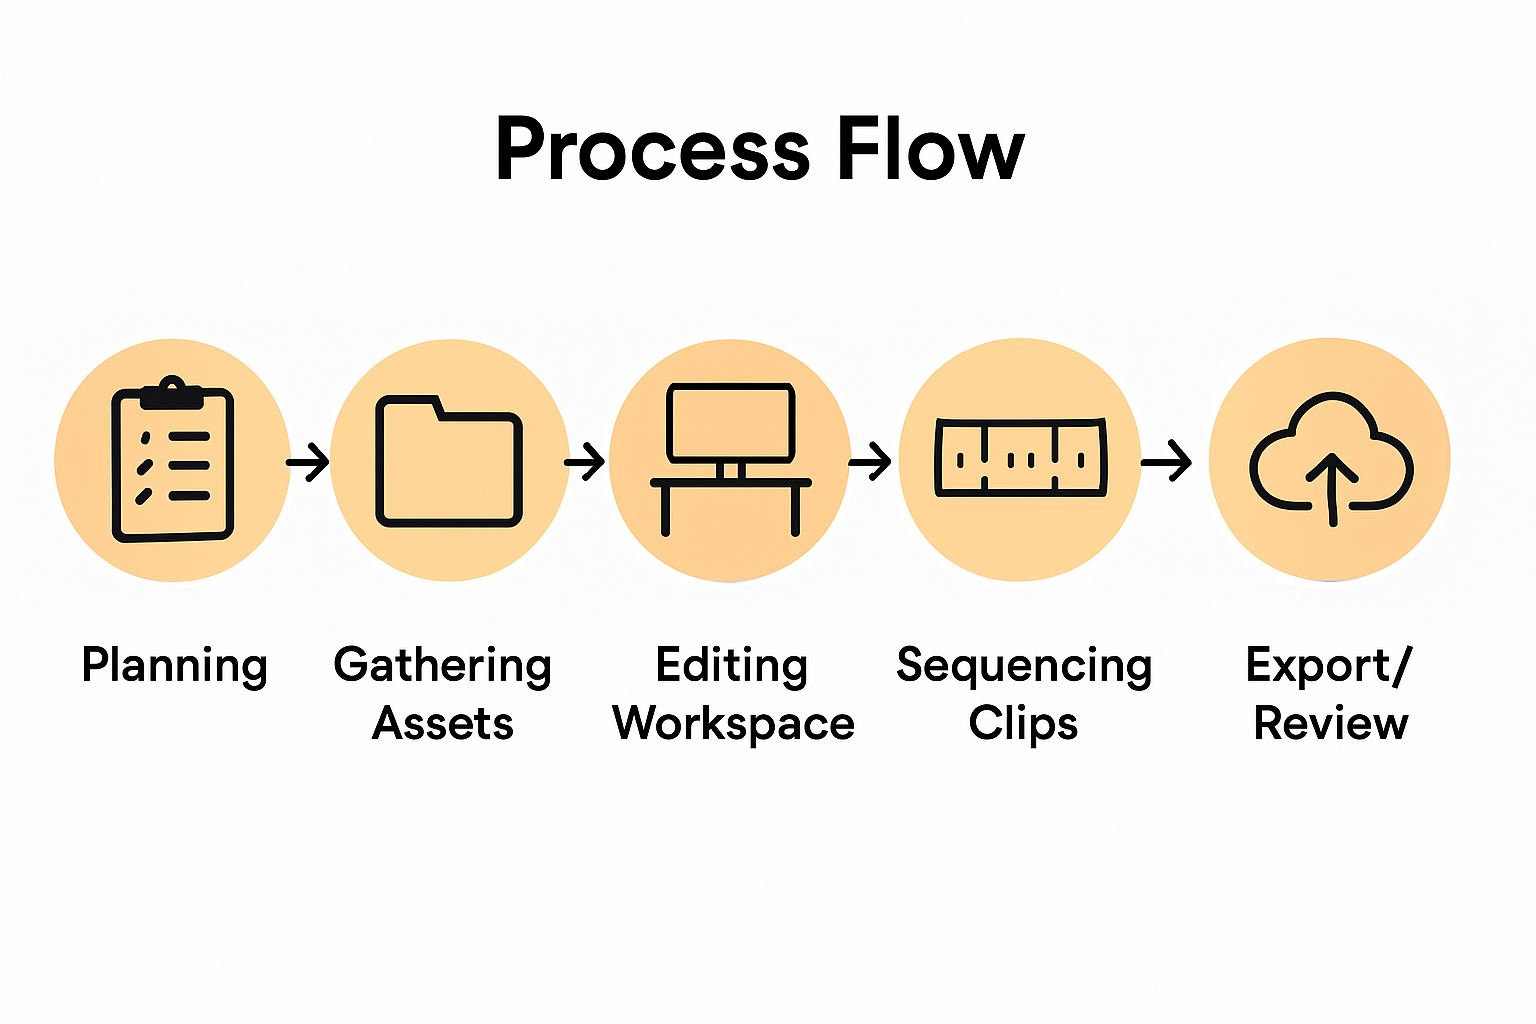
Step 1: Define project goals and gather assets
Successful video editing starts with crystal clear project planning and systematic asset collection. Your first mission is to map out exactly what you want to achieve and compile all the raw materials that will transform your creative vision into a polished final product.
Begin by clearly defining your project objectives. What story are you telling? Who is your target audience? Are you creating a promotional video, wedding highlight reel, or corporate presentation? Each type of video demands a unique approach. Next, organize your media files systematically across a dedicated storage drive. Professional video editors recommend creating a structured folder system with subfolders for raw footage, audio clips, graphics, and reference materials.
Pro tip: Always verify your media files are compatible with your editing software before starting. Different video formats can cause unexpected compatibility issues that derail your entire workflow. Check resolution, frame rate, and codec requirements upfront to save hours of potential troubleshooting later.
With your goals defined and assets gathered, you are now prepared to move into the next exciting stage of video production preparation.
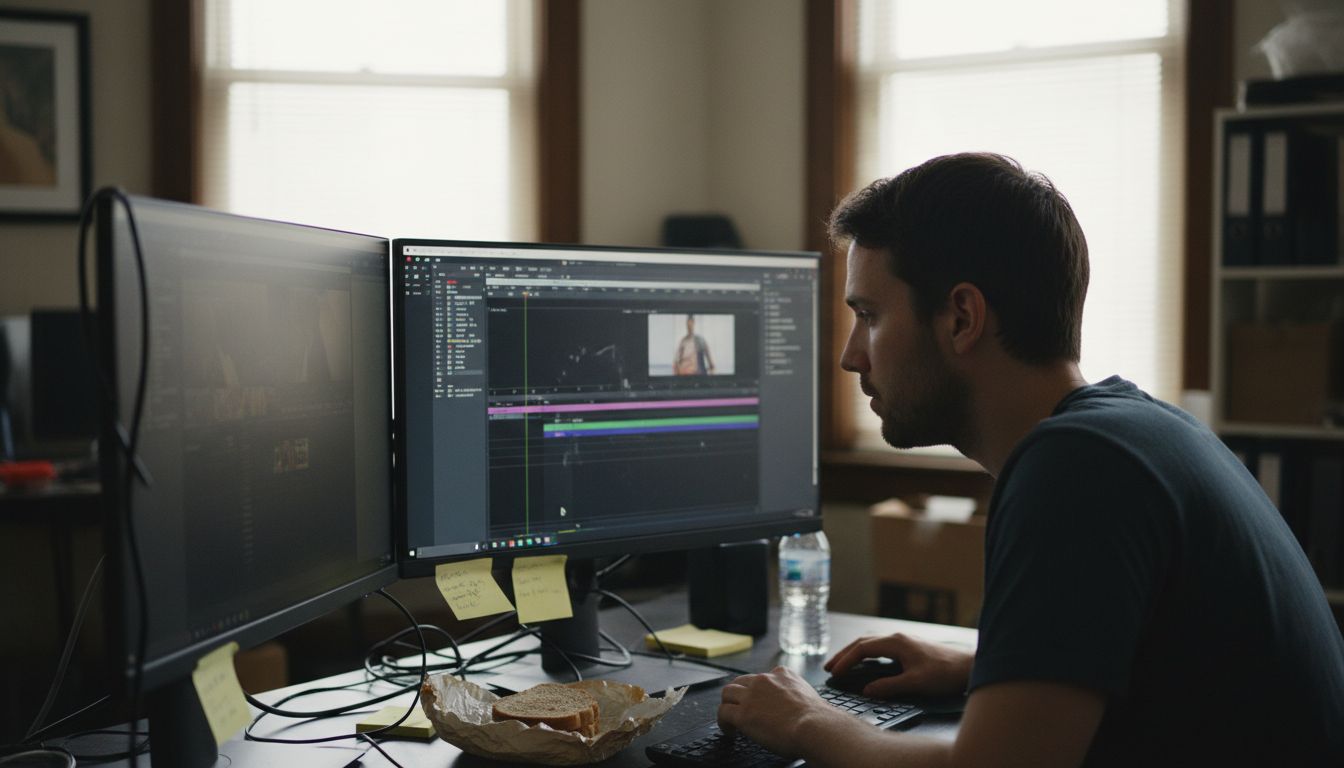
Step 2: Set up your video editing workspace
Creating an efficient video editing workspace is crucial for smooth and productive editing sessions. Your workspace will be your creative command center where technical setup meets artistic expression.
Arranging your editing panels and tools strategically can dramatically improve your workflow efficiency. Start by customizing your editing software interface to match your personal working style. This means positioning your video preview, timeline, project assets, and editing controls in a way that feels intuitive and minimizes unnecessary mouse movements. Most professional editing software allows you to save custom workspace layouts, so take time to experiment and create a setup that feels natural to your editing rhythm.
Pro tip: Invest in an ergonomic workspace. Use an adjustable chair with proper back support, position your monitors at eye level, and consider using an external keyboard and mouse to reduce strain during long editing sessions. A comfortable workspace directly impacts your creativity and productivity.
With your editing environment now optimized, you are ready to dive into the exciting world of video production and transform your raw footage into a compelling visual story.
Step 3: Organize and sequence video footage
Transforming raw video clips into a coherent narrative requires strategic organization and thoughtful sequencing. Your goal is to create a smooth visual story that captures viewers attention from start to finish.

Using the Project Panel effectively allows you to meticulously arrange and review your video assets before assembly. Start by importing all your footage into a single organized folder within your editing software. Review each clip using the Source Monitor to identify the best moments and mark key in and out points that will become the building blocks of your final sequence. Professional editors recommend color coding or creating subfolders to categorize clips by scene type, camera angle, or emotional tone.
Pro tip: Develop a consistent naming convention for your video files to prevent confusion during the editing process. Include details like date, scene number, and take number in each filename. This practice saves significant time and reduces the risk of accidentally using incorrect footage.
With your video clips now strategically organized and ready for storytelling, you are prepared to begin crafting the visual narrative that will bring your creative vision to life.
Step 4: Enhance visuals with effects and color
Taking your video from good to extraordinary requires strategic visual enhancement through carefully selected effects and precise color grading. This stage transforms raw footage into a polished professional production that captivates your audience.
Adding transitions and effects can dramatically elevate your visual storytelling. Begin by exploring your editing software’s Effects panel and experimenting with subtle transitions that smoothly connect different scenes. Drag and drop effects onto your clips, then fine tune their intensity and duration using the Effect Controls panel. For color grading, leverage the Lumetri Color panel to adjust brightness, contrast, saturation, and create a consistent visual mood that reinforces your narrative.
Pro tip: Less is often more when applying visual effects. Avoid overusing flashy transitions or color filters that distract from your core message. The most professional videos use effects sparingly as elegant punctuation rather than overwhelming visual noise.
With your visuals now polished and color graded, you are ready to bring your creative vision to life and craft a video that resonates powerfully with your intended audience.
Step 5: Refine audio and add music
Audio quality can make or break your video production transforming a good visual experience into an extraordinary storytelling journey. Mastering sound design is about creating a harmonious audio landscape that complements your visual narrative.
Managing multiple audio tracks requires precision and strategic editing. Start by syncing your primary audio sources like dialogue tracks and ambient sounds. Use your editing software’s audio tools to adjust volume levels ensuring each sound element sits perfectly in the mix. Remove unwanted background noise by applying noise reduction techniques and smooth out audio transitions between different clips. When selecting background music aim for tracks that enhance emotional resonance without overwhelming the primary audio elements.
Pro tip: Always use headphones during audio editing to catch subtle sound nuances that might be missed through standard speakers. Professional audio editing demands critical listening and minute adjustments that can elevate your video from amateur to professional.
With your audio now carefully refined and musically enhanced you have created a sensory experience that will captivate and engage your audience from the first moment to the last.
Step 6: Export and review your final video
You are now at the pivotal moment of transforming your carefully crafted video project into a shareable masterpiece. This final stage requires precision and strategic decision making to ensure your video looks and performs perfectly across different platforms.
Selecting the right export settings is crucial for maintaining video quality across various social media platforms. Choose export presets that match your intended distribution channel YouTube, Vimeo, Facebook, or Twitter. Pay close attention to resolution, frame rate, and compression settings to balance visual quality with file size. Render a high quality master file for archival purposes and create platform specific versions that optimize playback and loading speed for your target audience.
Pro tip: Always preview your exported video in its entirety on multiple devices and platforms before final distribution. What looks perfect on your editing monitor might appear differently on a smartphone or tablet screen. Check audio levels, color consistency, and ensure no unexpected rendering artifacts have been introduced during the export process.
With your video now expertly exported and meticulously reviewed, you have completed a professional video editing journey that transforms raw footage into a compelling visual narrative.
Elevate Your Video Editing to Professional Standards with Tulip Films
Mastering video editing involves tackling complex challenges like organizing footage, enhancing visuals, and refining audio to deliver captivating stories. You might feel overwhelmed by managing multiple files, perfecting color grading, or syncing sound for flawless output. The article highlights essential concepts such as setting up an ergonomic workspace, sequencing clips strategically, and exporting videos optimized for different platforms. These steps require both skill and creativity to make your vision come alive.
At Tulip Films, we understand these pain points and turn them into strengths. Our Swiss-based team specializes in providing personalized audiovisual solutions that ensure every frame reflects your unique story. Whether it’s an event, a corporate video, or promotional content, we focus on precision, thoughtful editing, and dynamic storytelling to engage your audience.
Ready to move from mastering the editing process to delivering top-quality videos without stress or delay?
Professional video production solutions await you.
Get in touch today to plan your free consultation and experience how Tulip Films transforms your raw footage into compelling visual narratives that resonate. Visit our homepage to view our portfolio and start your journey toward pro-level results now.
Frequently Asked Questions
How do I clearly define my project goals for video editing?
Defining your project goals involves specifying the story you want to tell and identifying your target audience. Determine if you’re creating a promotional video, wedding highlight, or corporate presentation, and outline the key message you want to convey.
What is the best way to organize my video editing workspace?
To organize your video editing workspace effectively, customize your editing software layout to fit your workflow style. Position essential panels like the video preview, timeline, and project assets in a way that reduces unnecessary mouse movements, aiming for an efficient and intuitive setup.
How do I sequence my video footage for a compelling narrative?
Start by importing and reviewing all your video clips, then mark the best moments using in and out points. Organize clips by scene type or emotional tone, and arrange them in a logical order that smoothly transitions from one part of your story to the next.
What are some tips for enhancing visuals in my video?
Enhancing visuals can include adding transitions and effects strategically. Use the effects panel to explore subtle transitions that connect scenes, and apply color grading to ensure consistency in brightness and mood throughout your video.
How can I improve the audio quality in my video?
Improving audio quality involves syncing your primary audio sources and adjusting volume levels for clarity. Use tools to remove background noise and ensure a balanced mix, creating an engaging audio landscape that complements your visuals.
What export settings should I use for my final video?
For exporting your final video, choose settings that match the platform where you’ll share it, such as YouTube or Facebook. Pay attention to resolution and compression settings to maintain high quality while optimizing loading speed for viewers.
Recommended
